

The Mobile App Development Process: Step-by-Step Guide
The Mobile App Development Process: Step-by-Step Guide

To ensure a successful project a structured mobile app development process needs to be followed. It’s crucial to follow a structured process. Below is a step-by-step guide to help streamline your development workflow.
Step 1: Assemble Your Development Team

A solid development team is essential for bringing your app to life. Depending on your approach (native or cross-platform), your team should include designers, developers, testers, and a project manager. If you’re building a more complex app, you might also need specialized roles like UX/UI designers and back-end developers. Businesses can choose between hiring an in-house team, outsourcing the work to an app development agency, or using freelancers.
Step 2: Research Your Competitors

Competitor analysis is crucial to understand what works and what doesn’t in your niche. By studying successful apps, you can identify trends, learn what users value, and discover opportunities for differentiation. Tools like AppTweak and Sensor Tower help you track competitors’ rankings, reviews, and user feedback. This research will help you shape your app’s unique value proposition.
Step 3: Define Core Features for Your App
Once you’ve completed your market research, the next step is to define the core features of your app. What problems will your app solve, and what features will it offer to users? Prioritizing features based on user needs and your business goals is essential. Some basic features might include user registration, notifications, payment gateways, and a search function. Keep in mind that additional, more complex features will increase development time and cost.
Step 4: Create Mockups and Prototypes

After identifying your app’s core features, the next step is to create mockups and prototypes. This allows you to visualize the app’s layout, user flow, and design before committing to code.
Tools for Mockups and Prototypes
Tools like Figma

and Adobe XD

are ideal for creating high-fidelity mockups. These platforms provide collaborative features, enabling designers and developers to work together in real-time. Interactive prototypes allow stakeholders to experience the app’s functionality early in the process, making it easier to gather feedback before coding begins.
Importance of Usability Testing in the Prototype Phase
Conducting usability testing during the prototype phase helps identify potential UX issues that might negatively impact user engagement. Early testing with real users gives you a clearer understanding of how intuitive and user-friendly your app is, allowing you to make changes before diving into development. This iterative approach ensures a more polished final product.
Step 5: Choose the Right Tech Stack
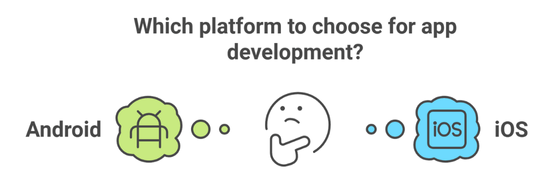
Choosing the right technology stack is a critical step that can affect your app’s performance, scalability, and development timeline. Whether you go for native or cross-platform development will influence your decision.
Native Development Tech Stack
For native development, iOS developers usually work with Swift or Objective-C within Xcode, while Android developers rely on Kotlin or Java using Android Studio. These native stacks offer full access to platform-specific features, ensuring optimal performance and user experience.
Cross-Platform Development Tech Stack
If you opt for a cross-platform approach, the two most popular frameworks are Flutter and React Native. Flutter, developed by Google, uses the Dart programming language and offers a rich UI experience. React Native, maintained by Facebook, allows developers to build apps using JavaScript and is known for its large community and easy integration with third-party libraries.
Balancing Performance with Development Time
While native apps offer superior performance, cross-platform development allows you to build apps for both Android and iOS using a single codebase, reducing development time and cost. However, cross-platform apps might lack the full functionality or performance that native apps provide, especially for highly complex applications.
Step 6: Front-End and Back-End Development
Once the prototype and tech stack are in place, it’s time to start actual development. App development is typically divided into two parts: front-end and back-end development.
Front-End Development: Crafting the User Interface
Front-end development focuses on creating the visual aspects of the app, including the layout, design, and user interactions. This phase is crucial for ensuring a seamless user experience. For Android, the front end is typically built using XML for layout, while iOS uses SwiftUI or Storyboard for UI design. In cross-platform development, frameworks like Flutter and React Native offer pre-built components that mimic the native feel.
Back-End Development: Powering the App’s Logic
Back-end development involves setting up the server, database, and APIs that allow the app to function. This part of the process handles user authentication, data storage, and interaction with external services like payment gateways. Developers typically use Node.js, Python, or Ruby on Rails for back-end development. In some cases, cloud services like Firebase or AWS can be used to handle back-end tasks efficiently.
Importance of Coordinating Front-End and Back-End
Both front-end and back-end development teams must work closely to ensure that the app’s user interface interacts smoothly with the server and databases. Proper communication between teams minimizes integration issues, resulting in a smooth app launch.
Step 7: Testing Your App on Android and iOS
Testing is a critical phase in the development process, ensuring that your app is free of bugs and delivers a smooth experience on both Android and iOS devices. Thorough testing helps catch errors early, preventing costly fixes after launch.
Types of Tests: Usability, Performance, and Security
There are several types of testing you should perform during the development process:
- Usability Testing: Ensures the app is intuitive and user-friendly.
- Performance Testing: Checks the app’s responsiveness, load times, and resource usage.
- Security Testing: Verifies that the app is secure from vulnerabilities, such as data breaches and unauthorized access.
Both manual and automated testing are necessary to ensure that the app functions correctly across different devices, operating systems, and network conditions.
User Testing Platforms: PickFu and TestFlight
User feedback is essential for refining the app before launch. Platforms like PickFu allow developers to gather real-time feedback from users, while TestFlight enables beta testing for iOS apps. Android apps can be beta-tested using Google Play’s built-in testing tools.
Step 8: Implement Feedback and Fine-Tune the App
After gathering feedback from user testing, it’s time to implement changes. This stage is crucial for fine-tuning the app and making sure it meets user expectations.
How to Gather User Feedback Post-Testing
Once beta testing is complete, it’s important to analyze the feedback from users carefully. Identify patterns in user complaints, such as recurring bugs, performance issues, or requests for additional features. Prioritize the most critical changes, especially those affecting usability and performance.
Iterative Development and Continuous Improvement
Development doesn’t stop after the initial version is complete. Most successful apps follow an iterative development process, where new updates are rolled out regularly. Implementing continuous improvements based on user feedback ensures that the app evolves and remains competitive in the market.
Step 9: Launching on the App Store and Google Play
After thorough testing and refinement, the next step is to launch your app on both the Apple App Store and Google Play Store. Each platform has its own submission guidelines, and following them carefully is crucial for a successful launch.
The Submission Process for the Apple App Store
For iOS apps, submission is done through App Store Connect, where you will need to provide detailed information about the app, including screenshots, a description, and app categorization. Apple’s review process is more stringent, often requiring multiple days for approval. Make sure your app adheres to all of Apple’s guidelines, including user privacy, design standards, and functionality checks.
The Submission Process for the Google Play Store
The Google Play submission process is generally faster and less restrictive. After signing up for a Google Developer Account, you can submit your app through the Google Play Console. You will need to provide similar details such as app description, screenshots, and categorization. Google Play also supports phased rollouts, allowing you to release your app to a limited audience to catch potential issues before full-scale release.
Common Pitfalls to Avoid During App Submission
Both app stores have strict rules regarding privacy policies, data collection, and user safety. Make sure your app complies with these standards to avoid rejections. Additionally, ensure that your app has been thoroughly tested for bugs and crashes before submission.
Tools for Android and iOS App Development
To develop a successful app for both platforms, developers rely on a variety of tools. These tools assist with everything from coding and design to testing and performance monitoring.
Native Development Tools
- Xcode (iOS): Apple’s official IDE for iOS development, featuring powerful tools for app design, coding, and debugging.
- Android Studio (Android): The official IDE for Android app development, which offers extensive tools for building, testing, and debugging apps.
- Swift (iOS): A programming language for iOS development that is fast, efficient, and designed to work seamlessly with Apple’s platforms.
- Java/Kotlin (Android): Android apps are typically built using Java or Kotlin, with Kotlin becoming the preferred language due to its concise syntax and modern features.
Cross-Platform Development Tools
- React Native: Developed by Facebook, React Native enables developers to write code in JavaScript and deploy apps to both Android and iOS. It’s popular for its fast development cycle and strong community support.
- Flutter: Backed by Google, Flutter uses the Dart programming language and is known for its impressive performance and beautiful, custom-designed UI components.
Design and Prototyping Tools
- Figma: A powerful cloud-based design tool that allows teams to collaborate in real-time on app wireframes and prototypes.
- Adobe XD: Another popular tool for creating app prototypes and mockups, offering seamless integration with other Adobe tools.
Marketing Your Android and iOS Application
Even the best apps can fail without proper marketing. To ensure your app reaches its intended audience, it’s essential to have a comprehensive marketing strategy in place before and after launch.
Best Practices for Pre-Launch Marketing
Start promoting your app before it hits the app stores. Create a landing page, build an email list, and use social media to generate buzz. Offer exclusive beta access to early adopters and encourage them to share their experiences.
Post-Launch User Engagement and Retention Strategies
After launch, focus on user engagement and retention. Push notifications, in-app promotions, and rewards can help maintain user interest. Regularly updating your app with new features or enhancements also ensures that users return to explore the app’s latest offerings.
Considerations for Post-Launch Maintenance and Updates
Once your app is live, maintaining and improving it over time is essential for long-term success. Regular updates ensure that your app stays competitive and relevant.
How to Address User Feedback and Bug Fixes
After launch, you’ll likely receive user feedback, which may include bug reports, feature requests, or complaints. Promptly addressing these issues is crucial to maintaining a positive user experience. Make sure to monitor app reviews on both the App Store and Google Play, as well as feedback channels such as email or social media.
Regular Updates: Why They Matter for User Experience
Regular updates keep your app fresh, ensuring that users continue to engage with it. Updates can include new features, performance improvements, or security patches. Frequent updates also show users that you’re committed to improving the app, which can boost user loyalty and retention.
Wrapping Up
Developing an app for both iOS and Android devices is a complex process. Choosing the right platform native or cross-platform development approach is key to success for your audience. Define a target audience and choose the development tools with a structured development process.
Regular testing, gathering feedback, and iterative updates are vital components that will keep your app performing well post-launch. Choosing the right team and partners for your app development journey also ensures that you can navigate the challenges that arise along the way.
If you are considering Android and iOS application development using effective strategies, working with an experienced development partner can help bring your vision to life while reducing the risks and costs involved.

Related articles

Optimize Mobile UX: Top 5 Practices for Better Engagement
Credit:- Freepik Focusing on mobile user experience is very important for online business success. Almost 60% of internet traffic comes...

The Ultimate Guide to Building a High-Performing Law Firm Website in 2025
Credit:- Canva Your law firm website design is more than just a digital presence—it’s your first impression, your brand, and...

Best Practices for MVP Development in 2025
Minimum Viable Product (MVP) development has evolved significantly in 2024, becoming a cornerstone for businesses aiming to validate ideas, attract...

Ready to Ship Your Vibe Coded App?
You've already done the hard part — validating your idea and building something that works. Let's turn it into a product your users can trust and your business can scale.